Introduction
In my first tutorial, we have seen how to do that:
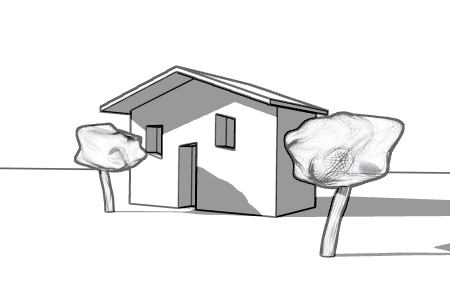
If you don’t know what I’m talking about, go and make it, then you can come back.
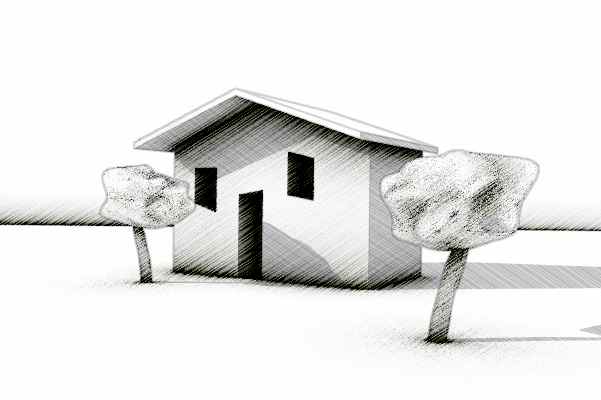
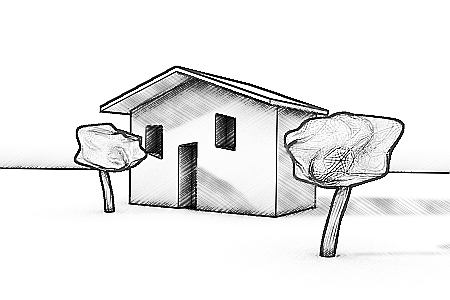
Now we are going to see how to get that:
ou need Blender 2.43 to do it. The complete and finished scene .blend is here. But you’d better start where the first tutorial finished (if you are lazy, the .blend is here ). We have in this scene two render layers, one with the edges, one with the shadows pass and they are mixed together.
Step 1 : hatches texture
We can easily mix the shadows with anything we want. You can see that as an input node you can choose images, textures, colors or values.
You can for example scan some drawing you made, but I found it more funny to make it 100% blender (and my drawing skills are very poor). I chose a wood texture so that I can add some variations into it. Here are the settings of my poil texture:
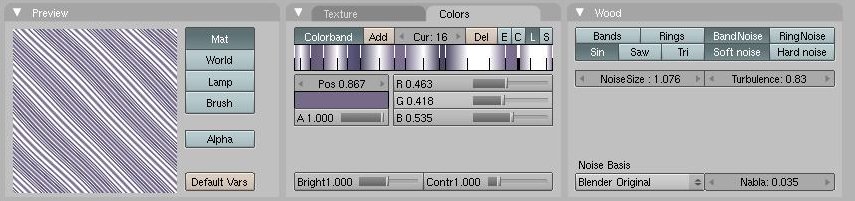
The color doesn’t matter. I used a lot of strips to try to make it less regular, but you can of course use less. You can play with Turbulence and NoiseSize to make it vary.
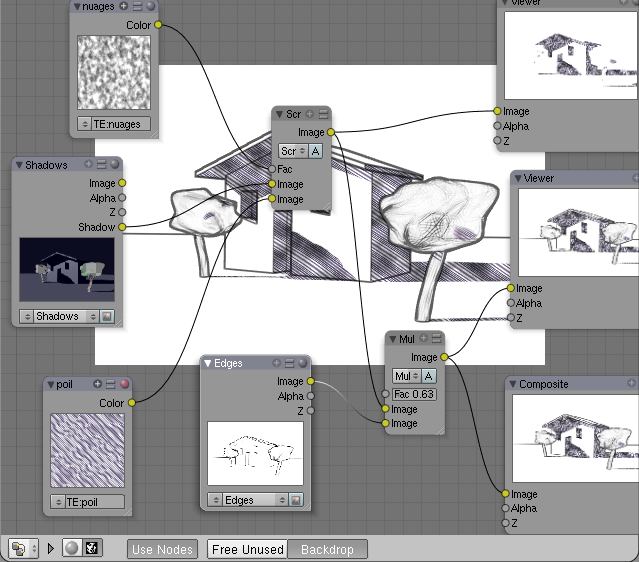
In the node editor window, add a texture node (Add,Input, Texture). Choose the poil texture. Add a mix node(Add, Color, Mix) on which you plug the render layer shadows and the texture. Choose Screen as mixing mode. You can make Fac value vary to give more importance to one or the other input of the screen node. Of course, mix the result of this node with the Edge render layer and you should have something like that:
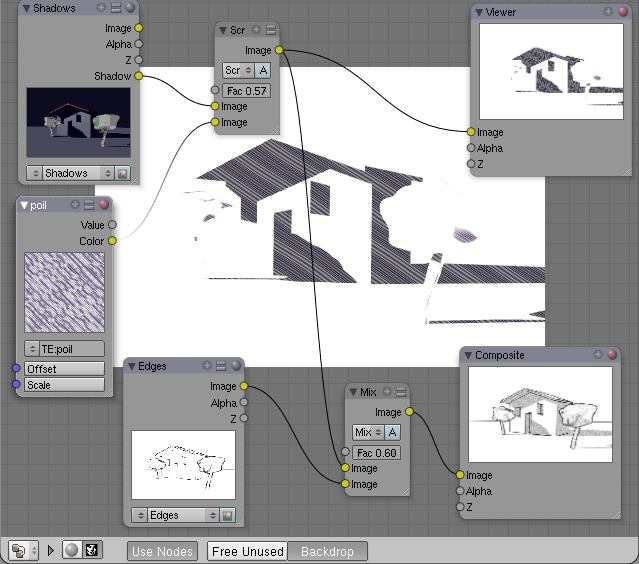
You can change the scale and the offset of the texture in the texture node. I used a scale of 3 here. We see here the use of the viewer node which allow to see something else than the final render. You can try the split viewer too, to compare two images.
Step 2 : make the hatches less regular
You can see on the mix nodes that there is a small circle in front of the Fac slider. It means that you can connect anything you want here. Connecting an image for example will make a value of Fac of 1 where the image is black and a value of 0 where the image is white (or the opposite, I don’t remember :D). Let’s try with a cloud texture (in my .Blend, the texture is called nuage, you just learned a french word !):

So lets add a nex texture input node with nuage selected, connected to the Fac of the screen node. I changed the other mix node to multiply to see what happens, and you should have the following:
Step 3 :AO (Ambient Occlusion) pass
Check first that the Ambiant Occlusion is activated in the world panel. Don’t worry too much for the quality, we don’t need a lot of samples.
In the render layer panel, activate the AO pass for the Shadows Render Layer:
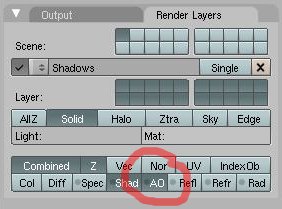
And tadam, we have a new output AO in the node Shadows. You can connect it to a viewer to see how it looks like. I think you should have an idea of what we are going to do now.
We are going to do with the AO pass the same thing than with the shadow pass. But to make it look better, we are going to change the orientation of the hatches. No need to make a new texture, just add a node Flip (Add, Distort, Flip) or Rotate if you prefer. But here something is not working as we would like to, at least on my computers. What I saw is that a texture input connected directly to a mix with an image or render is working fine, covering the whole image. But if you modify it first (flip, rotate , curves, anything), the texture becomes an image of the size of the texture preview, or even disappear.
To solve that, I used a simple trick, I mix first the texture with one of the render layers with a Fac set to 1, and voilà, no problem anymore.
So, I resume, after that you connect it to a flip node, then mix it with the AO pass (Screen mode) then mix again with what we had before:
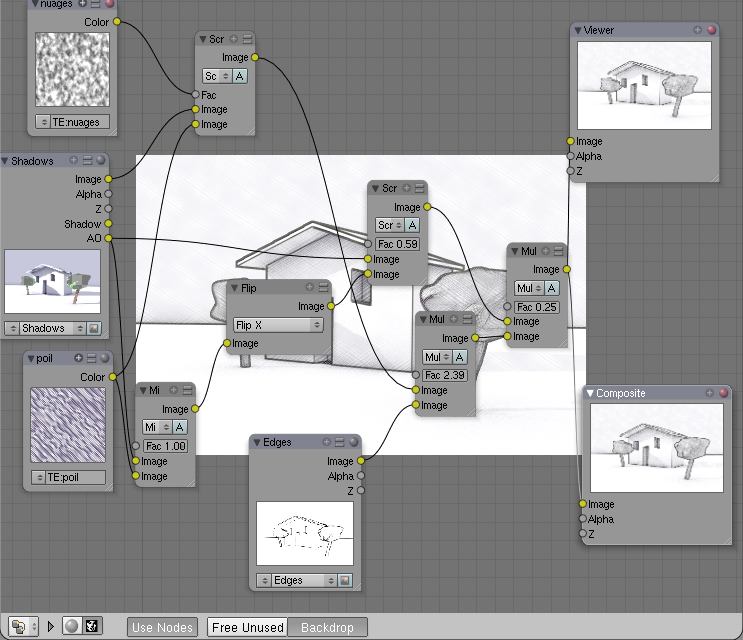
Its not yet exactly what we wanted, but we are getting closer.
Step 4 : let’s improve the result
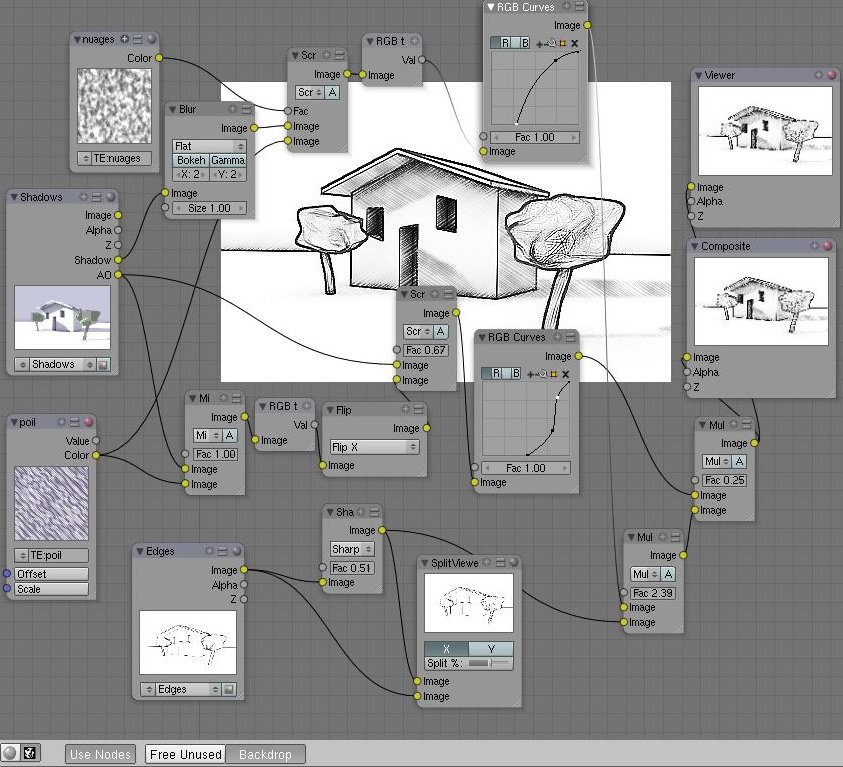
In fact it’s the most difficult part. No magic, you need some tweaking. For that you should add some RGB curves nodes (Add, Color, RGB Curves) and play with it. Adjusting the Fac values too you should reach your goal. As I used a colored texture for the hatches and finaly it disturbed me with the RGB curves, I added some RGBtoBW nodes (Add, Convertor, RGB to BW).
Then I tried some other things: I added some blur to the shadow pass (Add, Filter, Blur), and a sharpen filter to the edges (Add, Filter, Filter) and voilà messieurs dames :
Conclusion
Finaly, this is what I got:
The possibilities are endless, just have fun. I used it in animation too, the result is quite good.
I hope this tutorial can help. Happy Blending.
Février 2007